Cross Stitch Patterns from Fine Art by Scarlet Quince
 Cart 
 Wish list
     |     
     |     
Check out
     |     
     |     
Wholesale log in
Member services
Scarlet Quince
Goodies
Ramblings

Scarlet Quince Ramblings

Cross stitch ... art ... life

July 29th, 2013

In case you haven’t heard, the US Postal Service has renamed Express Mail. It is now Priority Mail Express. Apparently they did a study and discovered that people were confused between Priority Mail and Express Mail. I’m sure this will clear that right up. :)

As far as I can tell, there are no rate changes at this time. Just a new name.


July 1st, 2013

Let’s start by saying that joining two pieces of fabric for a single cross stitched piece is not a good idea unless you are making something the size of a theater curtain. But occasionally people find (after they are well into a project) that their fabric is too small. This can happen because they calculated the size wrong (we recommend using our fabric calculator) or because the weave is not quite what it is supposed to be. Always check!

I tested my ideas about joining two pieces of fabric on scraps of aida and linen. I bought some Pellon fusible sheerweight interfacing and some Stitch Witchery.
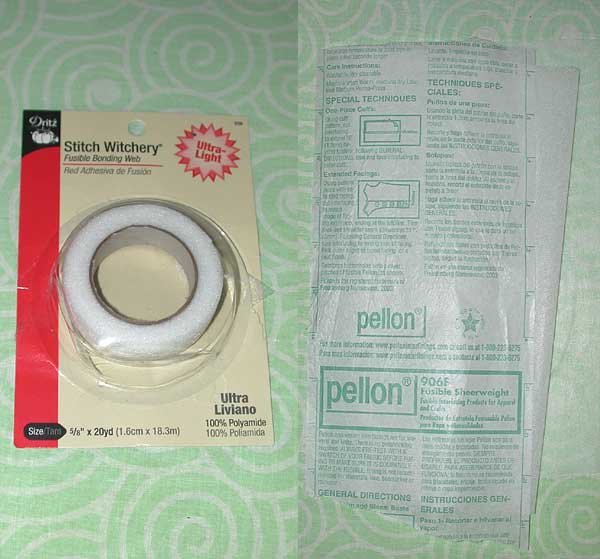
The Stitch Witchery is just a band of adhesive. It’s really for putting between two pieces of fabric, say if you need to fix a hem and don’t feel like sewing it. I knew that but thought it might work to bond it to the fabric with a piece of tinfoil on top. Unfortunately it bonded very thoroughly to the tinfoil as well as the fabric.

The Pellon is a non-woven, very sheer interfacing with tiny glue dots on one side. You can see it there, sort of (sorry about the terrible pictures) — it’s the white stuff to the right of the Pellon label. And don’t be like me and get a piece that doesn’t include the instructions for fusing it!

Start by pressing the fabric on the appropriate setting (cotton or linen), then trimming the edges you want to join so that they are perfectly straight and there are no frayed bits. Trim between the threads. (It’s the vertical edges in this picture.)
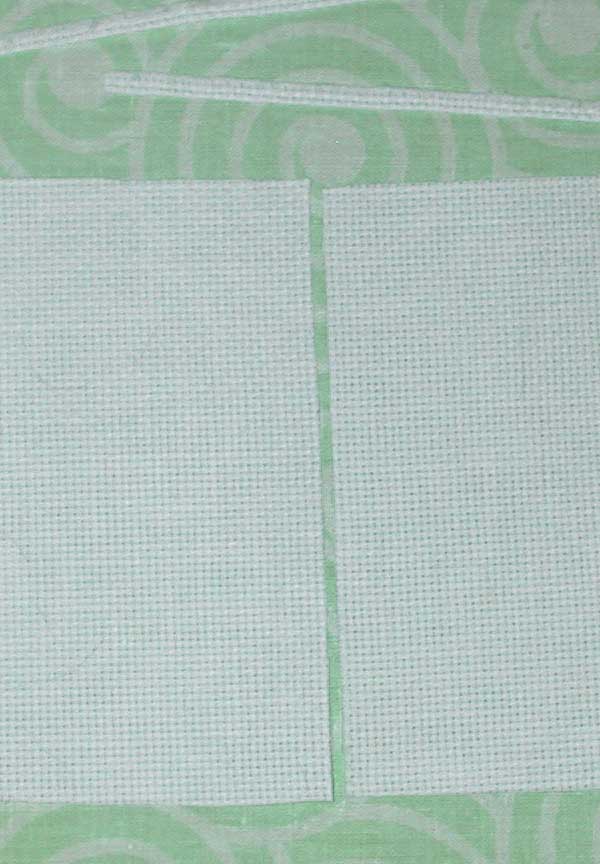
Cut a strip of Pellon about an inch wide and the length of the sides you need to join.

Put the strip of Pellon with the glue side up on your ironing board. Put one piece of fabric on it so that half is under the fabric and half is sticking out. You are going to fuse the fabric one piece at a time to minimize the chance of it shifting.
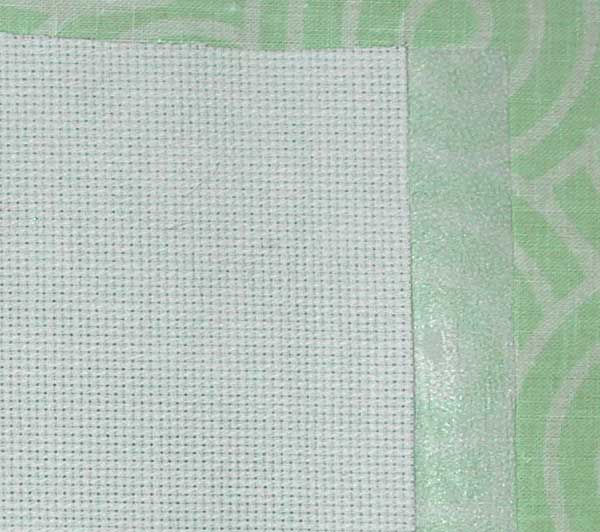
I had to search for instructions for fusing the stuff and this is what I came up with. Follow the instructions that come with your Pellon if they’re different. Set the iron to the polyester setting. Put a damp press cloth over just the part you want to fuse. Something without a hem would be better. The hem is over a little of the exposed glue dots — I only pressed up to the hem. Put the iron down on the press cloth and leave it for about 10 seconds. Don’t rub it around. Just set it down and leave it in one spot.

After 10 seconds, pick up the iron. The press cloth should be dry where the iron sat. Let the fabric cool and check the bond. Apply more heat if it doesn’t seem completely fused. Continue in sections until the Pellon is all fused to one piece of fabric.

This is the back (glue dots down).
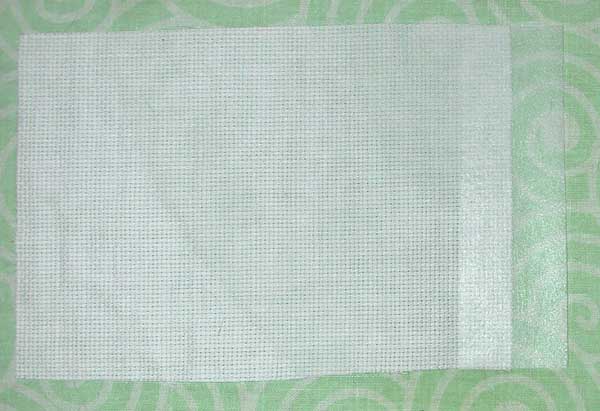
Now, with the glue side up again, carefully put the other piece of fabric on the Pellon butting up against the first piece of fabric. You have to make the threads that go across the join line up. This is where you will wish you were dead, but don’t despair — a little patting and prodding and it will work out. Carefully put the damp press cloth over the whole thing. Tap it briefly with the iron, then peek and make sure it didn’t somehow shift. Then finish fusing it. Here is the fused piece with the Pellon on the bottom. Pretty good!
Now just continue stitching. When you get to the Pellon, you can still see the holes but you can’t really find them with your needle anymore from the back. I ended up doing this: before each “down” stitch, I poked a hole where the next “up” stitch would be. (You can poke a lot of holes in advance but they tend to close up.)

Wherever you can, carry the thread across the join, like this, even if you are carrying the thread a lot farther than you normally would:
This will strengthen the join. The Pellon is not very strong by itself. (There are stronger weights, but you need to be able to see through it.)

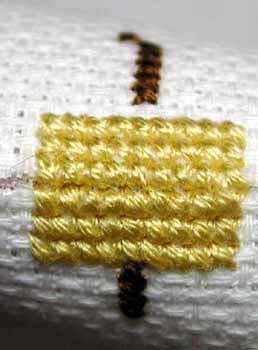
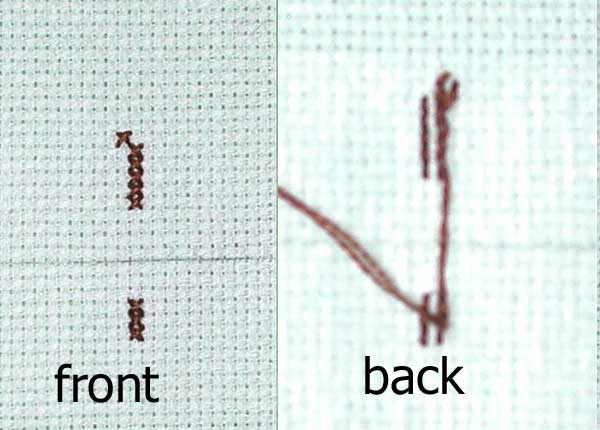
Here’s a little swatch stitched across the join. Can you see it? It’s between the 3rd and 4th row of yellow stitches. You can see it if you know where it is, but I think it would be OK. The problem is, since it is only reinforced on one side, it breaks to the front (right photo), so you would not want to use it for a pillow or anything that didn’t have firm support behind it.

To alleviate the break problem, I tried stitching with sewing thread across the join before cross stitching over it. I made the stitches 2 cross stitches high and just used ordinary sewing thread. I used gray because there was a spool sitting right there and I figured the stitches would be covered by cross stitch.

It helped with the break problem but the thread did show. The little fuzzy frayed ends got up into the stitches too.
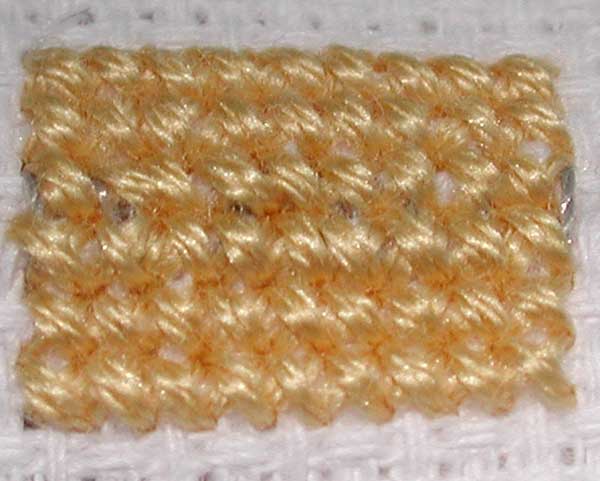
So then I cut a strip of Pellon about half an inch wide and fused it over the join in the front. It’s harder to stitch through two pieces of Pellon than one, but not much. Just keep poking those holes. You can still see them — the Pellon fills most of this picture — compare the holes at the very top and bottom.
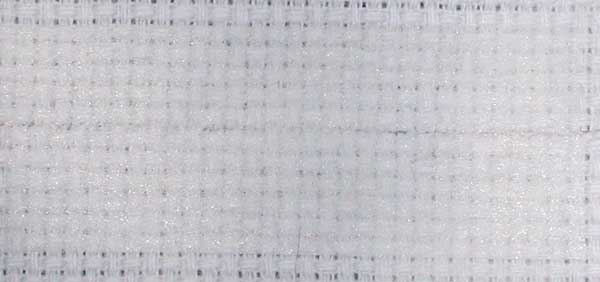
This is much better (regarding the tendency to break) and it is also stronger.
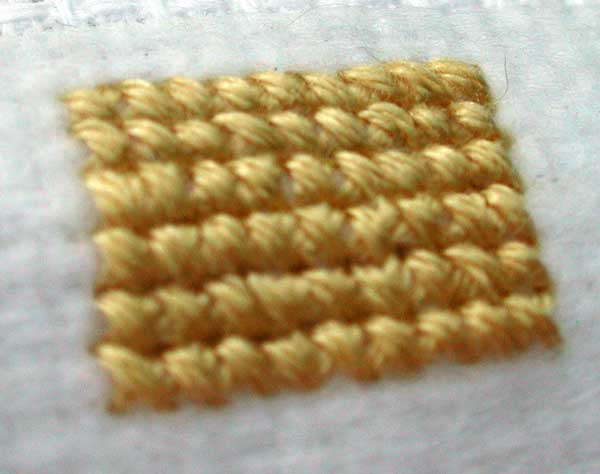
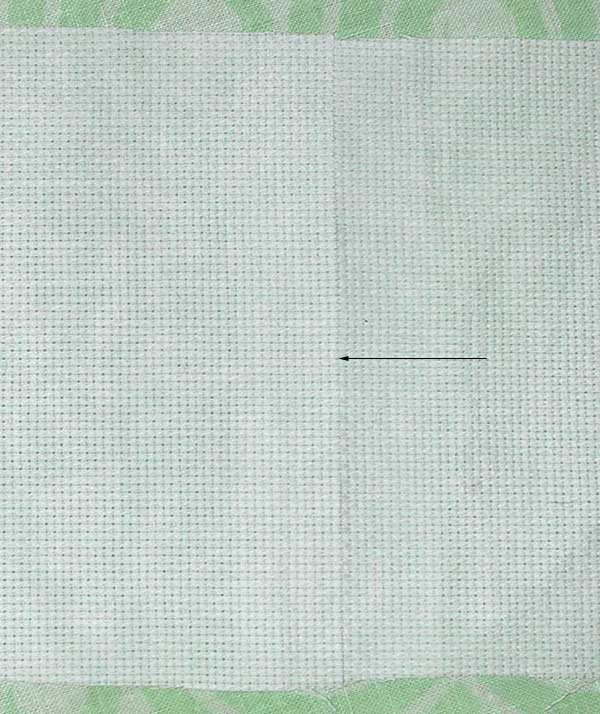
You can join linen in the same way, with one important difference: trim the fabric in such a way that you are cross stitching OVER the join (assuming you are stitching over two), instead of having the join between two rows of stitching. Count it, check it, and double-check. It won’t be terrible if you don’t get it right but it is significantly better if you do. The arrow points to the join. Although you can’t tell from the cropped photo, the fabric is curved and you can see a little break at the join where there is no stitching but the stitching is very flat.
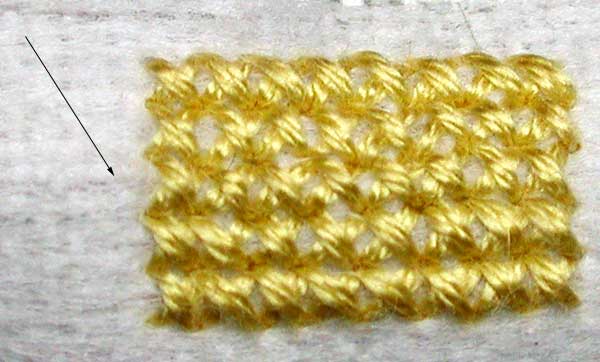
For some reason the Pellon is coming loose from the linen. I don’t know why. It might be because this is a pretty loose weave, so maybe a lot of the glue dots are in holes. Once you have stitched over it all, it doesn’t really matter whether it is fused or not, but if I were doing more than a little swatch, I would refuse it. Having it coming loose makes it harder to stitch.

Do warn your framer about your join. The linen is stronger than the aida because it is stitched across the join, but you don’t have to pull too hard to see the join in the aida open up just a tiny bit.

Another possible way to do this would be to lap one piece of fabric over the other and have a section where you are stitching through two pieces. I haven’t tried that because I think it would make a bump. As soon as I typed that sentence, I decided I needed to try it.

I tried it 3 ways and found that it doesn’t so much make a bump as a wide place. I lapped the upper piece of fabric over the lower, reasoning that the light would normally be coming from above and this would be the best way to avoid a shadow. I now think that’s backwards — to avoid a shadow you want the lower piece lapped over the upper. Anyway.
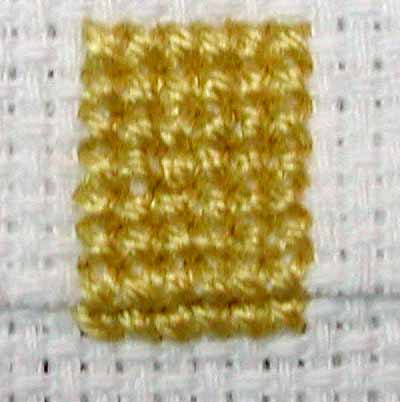
I first tried overlapping the two pieces and starting above the overlap and stitching straight down. I didn’t pin the pieces and had a lot of trouble with the fabric shifting and pivoting. As you can see, the last row of stitches (where the overlap ends at the bottom) is wider than the rest but even worse, the next row is too narrow.
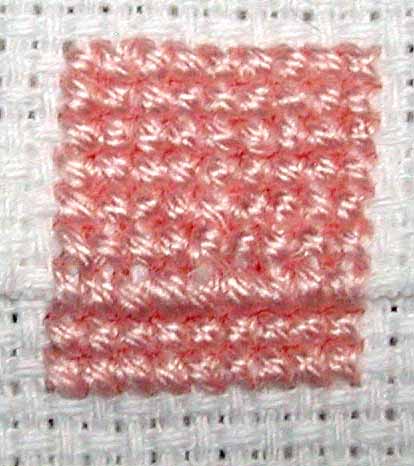
Next, I tried stitching the bottom row of the overlap first, and continued with the two rows below that. Then I went back up above the overlap and stitched down to the row I had stitched first. This time, I pinned it, which helped a lot. Also, by stitching the last row of the overlap first, it was easier to get the holes lined up for that row. It still is noticeable though. It seemed to me that now the problem was cumulative error in lining up holes pushing toward the “bump” row.
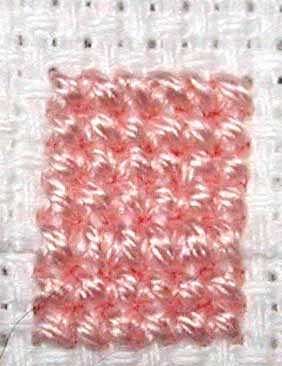
Finally, I tried starting with the bottom row of the overlap, then stitching the two rows below it, then turning the fabric upside down and stitching away from the “bump” row. This worked better and it was a little easier to line up the holes. They never really do line up, though. You have to find the hole on the bottom piece of fabric and then feel around in the top piece until you find the hole. And although this is a small sample and it’s hard to tell from the picture, the bottom row of the overlap IS noticeably wider than the surrounding rows. It is no worse than the effect you get sometimes stitching on linen when the weave is uneven, but you can see it, and in a row two feet long, it might be quite noticeable.
So, if you have to join two pieces, you have a choice between an invisible but somewhat weak join using Pellon, or a really strong but noticeable join overlapping the fabric. (My overlap was only 5 rows but it is rock solid.)


June 13th, 2013

I received a suggestion yesterday that we add a pattern of Edvard Munch’s The Scream. It has been suggested many times before and I wish we could use it. I’m sure it would be popular, particularly in this day and age when there seem to be so many good reasons to scream. But it is still under copyright and we inquired several years ago and could not get permission to use it. I explained this and the lady responded that she knew of at least two other cross stitch sites that have it. I’ve seen them too, but they are using the art illegally. I don’t know that 100% for sure, but I like to think our patterns are at least as good as anyone else’s, if not better, so it’s not likely that these other designers got permission to use the work while we were denied it. Maybe they negotiated the exclusive use of the work, but generally when someone has an exclusive, the rights holder says so. So it’s my belief that these designers are either ignorant of copyright or just don’t care. They’re small and apparently not worth the rights holders going after them. It’s really frustrating but much as I would like to offer a pattern that others have, it would be illegal. And wrong. I don’t think Munch (or his estate) would be injured by a high-quality cross stitch pattern, but it’s still their right to deny the use for that purpose.

We have also been denied the right to use the work of Pablo Picasso, Rene Magritte, Henri Matisse, Andrew Wyeth, Jackson Pollock, Marc Chagall, Georgia O’Keeffe, and Salvador Dali. If you see cross stitch patterns based on work by these artists, they are not being used with permission and the designers are not paying royalties. Then there are the artists (actually their representatives) who don’t bother to respond. These include Jack Vettriano, M. C. Escher, Thomas Kinkade, and Peter Max. Some of these may still be possible if I’m persistant enough, although I read somewhere that Peter Max made a decision several years ago not to license his work for anything anymore.

I often tell people that licensing art is a time-consuming process. Some of that is negotiating terms but most of it involves requesting permission, waiting, following up, waiting …

The good news is that Edvard Munch’s work will become public domain January 1, 2015. So we’ll be all over The Scream then!


February 26th, 2013

We are doing scheduled maintenance on Thursday night starting at 6 PM central time. The site will probably be down for a couple of hours, but hopefully not longer. So if you try to visit then — don’t worry, we’ll be back!


November 14th, 2012

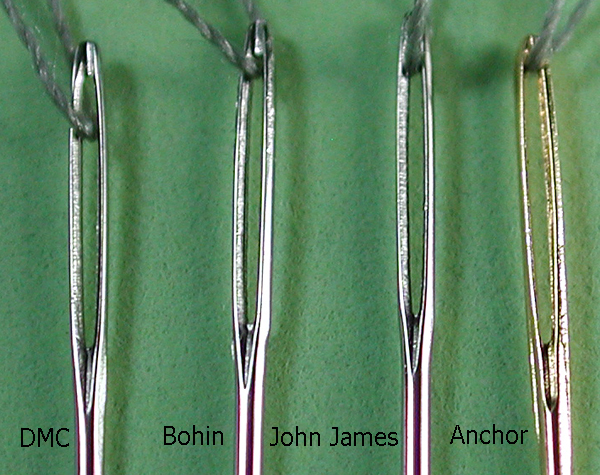
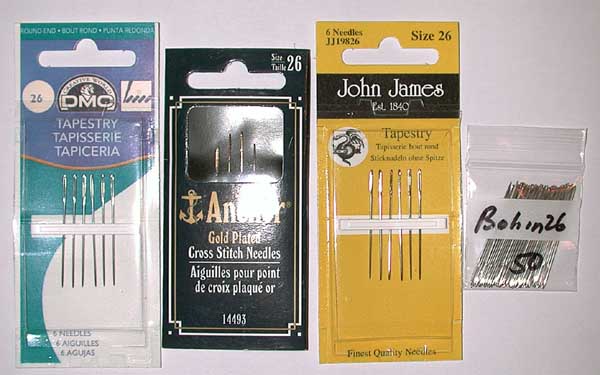
I thought it would be interesting to compare some different brands of tapestry needles. Is there a best kind? I looked at four brands: DMC, Bohin, John James, and Anchor.

There are a bunch of other brands — a quick search on Amazon turned up Dritz, Susan Bates, Colonial, Mary Arden, and Piecemakers. The needles I used were all brand new out of the package. I used size 26 because that’s what I like to stitch with (I know many of you prefer the smaller size 28, but I have trouble with the eyes breaking).

I took some measurements with a dial caliper accurate to 0.001 inches.

Most were about the same length, with the Anchor being a little shorter:

       DMC - 1.344"
     Bohin - 1.343"
John James - 1.354"
    Anchor - 1.283"

They were all exactly the same diameter: 0.0235″ (in the middle). This should correspond to some wire gauge (and probably does) but it’s nothing obvious like 26.

Next I measured the thickness of the eye (by which I mean the direction that the thread goes through). There was more variation here:

       DMC - 0.0180"
     Bohin - 0.0190"
John James - 0.0185"
    Anchor - 0.0150"

It’s true that these are tiny numbers but note that Bohin eye is 25% thicker than the Anchor eye!

I also measured the width of the eyes (going across the opening, in the middle). This affects how hard or easy the needle will be to thread.

       DMC - 0.0330"
     Bohin - 0.0365"
John James - 0.0315"
    Anchor - 0.0340"

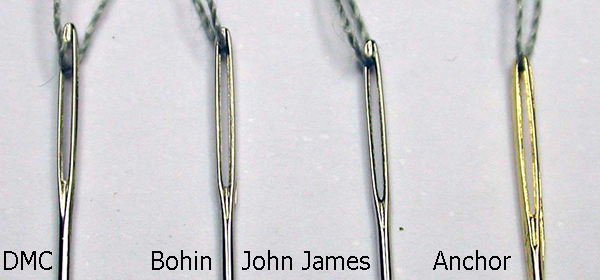
The first three eyes are similar, but the Anchor eye has a weird kind of flange along the sides. Maybe this makes it stronger.

The Anchor needles were gold-plated. Unfortunately this does not seem to be a good thing. They use such a tiny amount of gold which they have to be careful not to polish off, so you can see individual specks of gold and the Anchor needles feel a little rougher than the others. But I could be imagining that just because they LOOK rougher. I couldn’t tell any difference in the smoothness of the other brands (which I believe are all nickel-plated).

I tried to get a sense of their relative sharpness. For a tapestry needle, blunter is better, to reduce the chance that you’ll split a thread. My unscientific method was to take two needles at a time, holding them together, and scratching them along a piece of paper, and looking at which made more of a scratch. My conclusion was that the sharpest was Anchor, followed by John James, followed by DMC and Bohin (I couldn’t tell any difference between those two).

Another consideration is how rough the inside of the eye is. It’s possible to see (under magnification) that all of the needles are not smooth inside, and I suspect it’s not possible to polish the inside of a machine-made needle. I don’t know if there is any difference, although I swear I have had needles that could have doubled as thread cutters. One might measure it by scraping a thread back and forth along the inside of the eye and count how many times it takes before the thread breaks but this seems like a lot of work for an inconclusive result (the pressure would probably vary).

This is not a great picture but you try taking a picture of the inside of a needle’s eye! You can see that all the eyes are rough(er) inside. The Bohin needle seems to have some roughness on the outside as well. Examined under a 9x jeweler’s loupe, I could see that all the needles have some marks on the outside of the eye, mainly on one side. This is apparently an artifact of the manufacturing process.

Regarding price (and this is just what I paid; your mileage may vary):

DMC is $1.25 for 6 or 21 cents each
John James is $2.00 for 6 or 33 cents each
Bohin is $11 for 50 or 22 cents each (or non-bulk, $2.12 for 6 or 35 cents each)
Anchor is $2.10 for 4 or 53 cents each (that’s the gold plating)

Other information:

The DMC package says nickel-plated steel, made in China, inspected and packed in England.

The John James package says assembled and inspected in England using needles imported by Entaco to our quality and specifications. Entaco is located in Redditch, England, but it doesn’t say where the needles are made. These needles are probably nickel-plated too. John James also makes gold-plated and platinum-plated needles.

My Bohin needles came in a tiny baggie so I don’t have the official package, but it is a French company and it seems that the needles are still made in France! The web site seems to indicate that the needles are nickel-plated.

The Anchor package says gold plated, made in India, Susan Bates Division of Coats & Clark.

The conclusion? Your preferences may be different than mine, but I like the Bohin needles a lot. They seem sturdy and well-made, and in bulk they’re very reasonably priced. The DMC needles are good too. John James has a reputation as a high-quality needle but I prefer a larger eye. I liked the Anchor least of all, with the spotty gold plating and weird and thin eye. The differences ARE small but in hours of stitching, they are not undetectable. I recommend that you experiment with different brands to see which you prefer.


June 5th, 2012

Another reader has shared her floss storage system with us! She says:

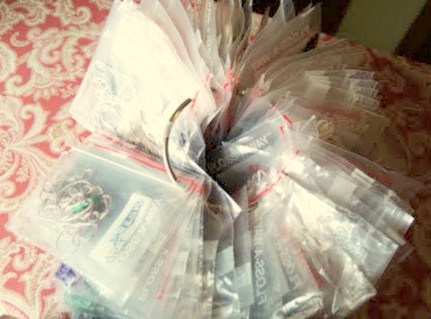
“I order the pattern booklet with three sets of labels.

“I attach a set of labels to floss bags on a ring. (I refer to this as “The Hold”.)

“Next, I take a razor blade and place it sharp side up in the crack of my dining room table formed by the leaf. I place a piece of tape 16” from the razor blade. I then take each color of floss and cut 16” lengths until done, and place them in the corresponding floss bags. (“The Hold”)

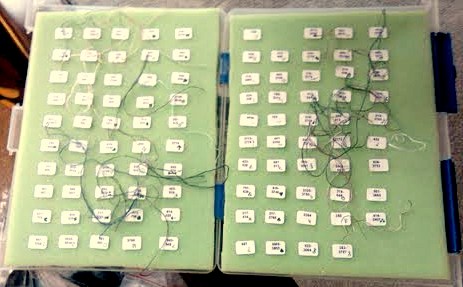
“I purchased a 1” deep plastic container with a hinged cover. I placed 1” thick, dense foam in both sides of the container. I then attached the second set of labels in rows onto the foam sides. I purchased enough needles to fill each spot. I load each needle with the appropriate color of floss. (I refer to this as “The Deck”.)

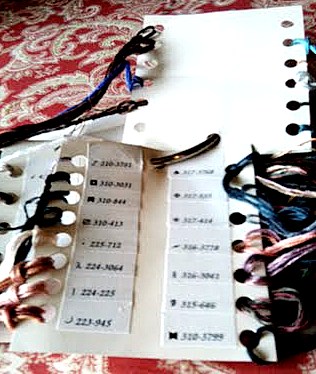
“I then made several 3” by 6” cards, running holes down both sides with a hole punch, and attaching the third set of labels next to each hole. Placing one hole in the left corner of each card, and putting the cards onto a ring through these holes. I loop three floss lengths per symbol through the holes.(I refer to this as “The Cache”.)

“Now when I am ready to stitch, I take the needle from The Deck corresponding to the symbol. When I run out of floss in the needle, I take from The Cache. When the Cache become depleted, I pull from The Hold.”

What do you think?


May 7th, 2012

I decided I really can’t do without my blend bobbins. The reason is all of the parking I’m doing — sometimes I have several needles with the same color parked in different places, and as I finish them off it doesn’t make sense (to me) to leave 5 needles threaded with the same color, so I keep one threaded and put the other pieces back on the bobbin. If I had 1000 needles, I’d probably feel differently.

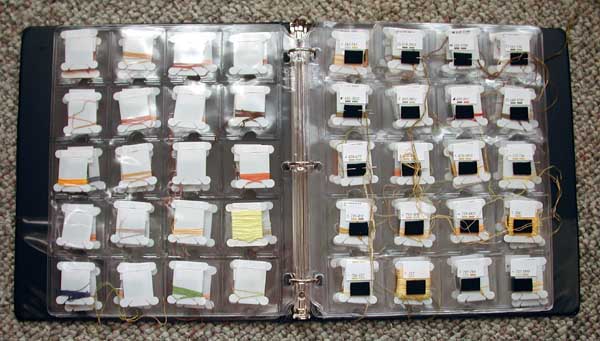
I was going to sew pockets on the felt sheets but then I thought, maybe there is something that already has pockets. It turns out that plastic pages for holding 35 mm slides have the right size pockets, but the camera store that used to be near us is gone, and I couldn’t wait, so I went to Hobby Lobby and got some coin pages instead, which also have 2″ pockets. They are pretty heavy duty plastic; probably heavier than slide pages would be. I am not sure which is preferable.

I stuck a floss label at the top of each pocket. I had a sheet of self-adhesive felt (with a peel-off backing) which I cut into small pieces and stuck to the pockets below the labels. These will hold the threaded needles. (White felt would have been more attractive but black was what I had, and after the minor miracle of being able to FIND it, it would have been a shame not to use it.) I put the pages into a 3-ring binder and ta-da!

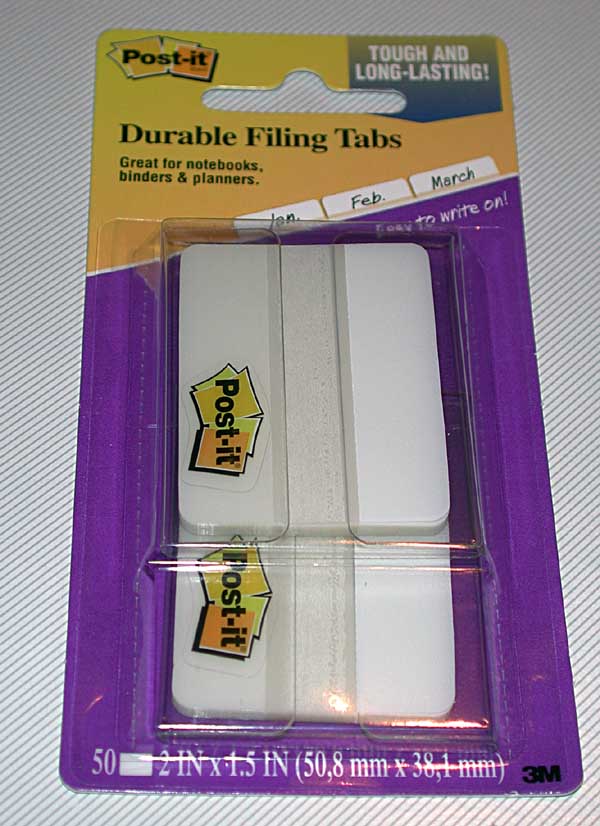
After working with this for an evening, I felt that there was one thing missing — tabs, so I can turn to the right page. I got these at Office Depot:

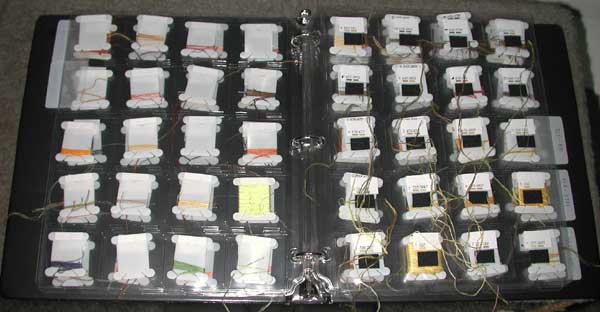
I think they’re meant to be stuck to the front of the page (because one side of the tab is easier to write on than the other) but I hadn’t left room so I stuck them on the back. Now my book looks like this:

Each tab has on it the range of numbers on the NEXT page. I didn’t get that right at first. You don’t need a tab for the first page because it’s right there when you open the book. The tab on the first page has the numbers for the second page, so when you open to that tab, it’s the second page. It’s hard to explain, but think about using tabbed dividers — you put the divider BEFORE the page you want to open to.

This is pretty nice now. With the parking, I have lots of colors going at once and although the needle book is a little cumbersome, it is much faster to find the right bobbin/needle than searching through the jumble of active bobbins I was keeping in a shallow box. It is also faster to jab the needle into the little felt swatch than to wind the floss around the slots in the bobbin (which is what I was doing with the threaded needles before). Because of the plastic behind the felt, you can do it one-handed. If you can’t find the self-stick felt, you could use velcro dots (just the soft side).

Update 5/8/12: Another thing further experience has taught: Put the numbers for the current page on the back of the tab. So the tab on page 1 would have the numbers for page 2 on its front, and the numbers for page 1 on the back. This way when you are open to a later page, you can get back to an earlier one without hunting.

Further update: 5/9/12: When I sat down to stitch last night, the first needle I took up was gummy. So instead of spending half an hour stitching, I spent half an hour using Goo Gone on my needles and putting them back in the felt making sure that they didn’t get down into the adhesive. I think the best option, therefore, is to use adhesive velcro dots. They have a tightly woven back between the fuzzy stuff and the adhesive. You could perhaps glue plain felt to the sheets, but that seems like a lot of work with a doubtful outcome. I tried superglue, which at least dries hard, but it didn’t hold the felt very firmly, and if I superglued 100 pieces of felt I’d end up with all my fingers glued together.

One more thing: 5/14/12 I found adhesive velcro strips which I can cut into rectangles that will be a better shape for needles than dots (and more cost-effective). I’ve also discovered it’s a good idea to loop the floss once around the needle to keep it from coming off when I flip pages.


April 8th, 2012

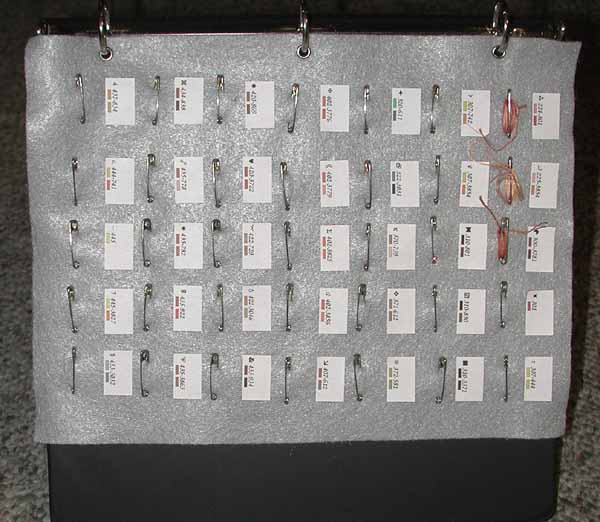
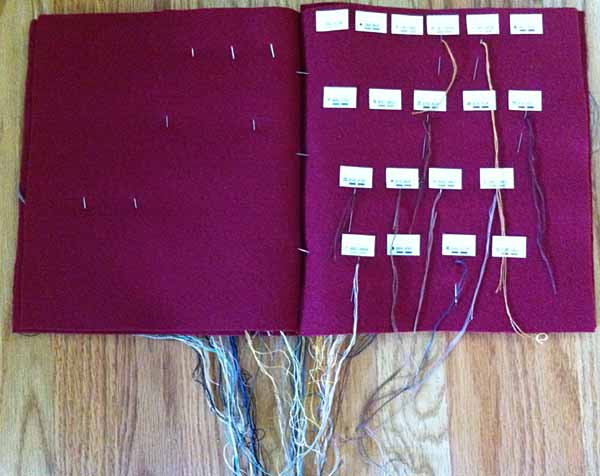
Here is my first attempt at a needle book. How many problems can you see (besides being sideways — you don’t get credit for that one)?

First, the felt. It is “made in the USA of 100% eco-fi (polyester made from recycled post-consumer plastic bottles)”. While this sounds good in theory, it’s irregular in thickness, slick-feeling, and just plain nasty. You can see how plasticky it looks, and the floss labels don’t stick to it as well as they might. This is all JoAnn and Michael’s had. I don’t know if anyone has cotton felt anymore — maybe you can buy it by the yard if not by sheet (I didn’t look at the yard goods at JoAnn). If not, I’ll probably get some flannel and sew it into a double thickness.

Second, if you want to put your “pages” into a notebook, cut the felt so that it fits before you do anything else. These felt sheets were 9″ x 12″. The width was OK but I should have cut the sheet to 11″ so it didn’t stick out past the end of the notebook.

I had a bunch of 1/4″ grommets so that’s what I used but this limited me to a pretty small binder. Most of my binders have rings that are too big for 1/4″ grommets. (SOMEONE who lives here but is not me ruined my grommet hole-making tool — looks like he hammered it. What on earth? I don’t know if it would have been able to cut through this plastic felt even if the edge was intact.) If you want to use grommets and don’t already have some, they do come in bigger sizes.

I intended to use a portrait orientation so that’s why the labels are attached the way they are. (Be careful not to stick the first label too close to the edge. I did and had to move the whole first row, which doesn’t improve their stickiness.) Once I was done with the labels and the safety pins, I started looking for a notebook and realized it would be nicer if the notebook was set up like an easel. (I actually have a notebook that stands up — the cover is hinged horizontally and it stands on the edge of the cover with the spine as another leg. But the rings are too big for my grommets.) Turning a standard binder sideways will work — you just need to tether the covers together about 6-8″ apart so it will stand up without collapsing.

Because of the way I stitch (lots of parking and no leaving vertical gaps) I often have 2 or 3 lengths of a symbol, so I need someplace to store these as well as a threaded needle. I guess if I really had a LOT of needles I could just put them all in the needle book, but what I have been doing is storing all the lengths on a bobbin, and only leaving one threaded into a needle. I thought I would use safety pins to wrap the extra lengths of floss so I bought a box of quilter’s basting pins. This turned out not to work very well. For one thing, they’re too crowded. It’s awkward to wrap floss onto the safety pins when they’re so close together, and spacing them farther apart didn’t really help. It’s just difficult to wrap floss around something that’s fastened down. And the pins are really too short. It’s a lot of wrapping.

This also suggests that wrapping the floss around a threaded needle may not really be that great an idea. My experience with having a lot of colors parked is that while the floss looks like it’s in a terrible snarl, most of the time I can pull the strand I need free without any problems.

My next idea was attach bobbins to the felt. I sewed 4 bobbins to another sheet to play around with but this seems very awkward too. (And the sewing would be a whole separate issue, but one I don’t need to solve, now.)

I am currently playing around with attaching bobbins with velcro. If you put the hook side on the back of a plastic bobbin, it will stick to the felt. (It probably needs to be a plastic bobbin or a thick cardboard bobbin so it doesn’t get bendy from being pulled off.) Unfortunately, with this felt at least, only a few times of pulling the velcro away creates a long tail of loose felt fibers. It looks like a better approach is to put the hook side on the felt, and the soft side on the back of a bobbin. The velcro sticks well to the felt and to the bobbin, but the bobbin can be pulled off easily (I’m using half of a 1/2″ dot). I could use my existing bobbins which already have the labels on them. The velcro needs to be near the top of the bobbin so that the floss, wrapped at the bottom of the bobbin, doesn’t risk getting caught on the hook side of the velcro.

Or I could just get a LOT more needles to allow for having 2 or 3 threaded per symbol. Right now that sounds the simplest.

Last idea: you know the tabbed dividers you can get for 3-ring binders? You can get just the tabs, with peel-off sticky backs, to stick to anything you like. Those would be nice (I think) to label the range of numbers on a page so you can flip directly to the page you need.

Incidentally, I did look a long time at the foam sheets — some people have commented they stick their needles into labeled foam sheets. It seems like that wouldn’t work unless you got them ALL onto one page, and that seems like it would be awfully crowded. But clearly, it works for some people, and I haven’t tried it (yet).


March 28th, 2012

Here’s an idea for speeding your stitching in a couple of different ways. (It isn’t my idea, by the way — it was sent to me by a very clever person.) It relies on having enough needles so that you never unthread a needle. I do this more or less, by wrapping the floss on a needle around the appropriate bobbin, and leaving it there until the floss is used up OR I am done with that symbol for the foreseeable future, at which time I unthread the needle and wrap the floss onto the bobbin and file it in my bobbin box.

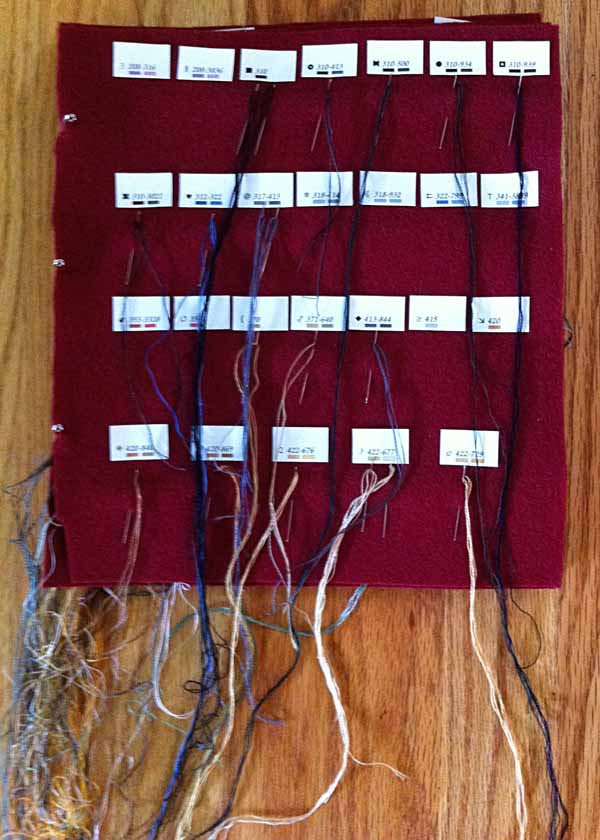
An even better way is to make a needle book out of felt sheets! Not a little bitty needle book like you might have for sewing needles. Buy several sheets of felt. They are approximately 9 x 12 inches. You can use safety pins to fasten them into a book, or use 1/4″ metal grommets and binder rings (or just put them in a 3-ring binder). Then, using our floss labels, stick the labels to the floss sheets in rows in numerical order. Leave the length of a needle between the rows (she says she discovered the needles should be stuck in from top to bottom, i.e. pointing down). It looks like this:

She says “I am constantly combing the threads down but they still get all tangled together. That’s OK though. I can still pull out the color I need.”

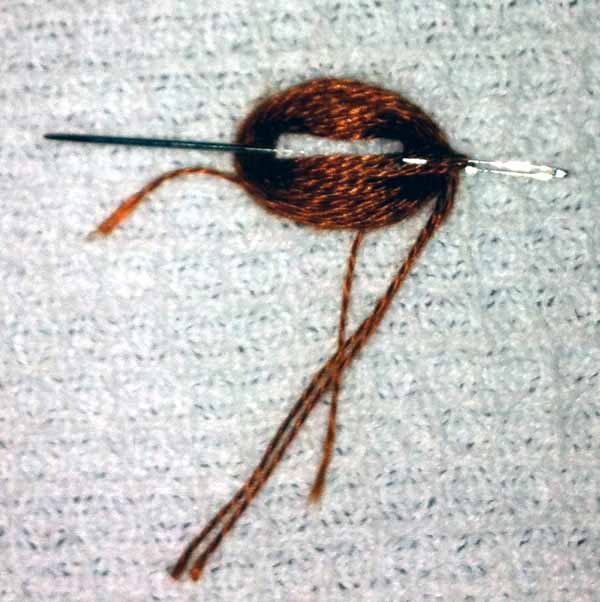
If you put the needles in horizontally, you could get a lot more per page (my needles are only a little longer than the floss labels are wide). I don’t know if they would tend to come out, but you could also wrap the floss tail around the needle, like this:

This is on a dishtowel — I don’t have any felt right now. This should keep the needle from coming out accidentally and it would solve most of the tangled tail problems. It does take extra time to wrap the floss on, but surprisingly, you don’t have to UNwrap it. Just pull the needle through. Even with a long piece like this, it comes easily!

You do need a needle for EVERY symbol, so you don’t want to be buying your needles 6 at a time. You need bulk needles and here are a few places you can get them:

Anita Little Stitches – Bohin and John James packs of 25 or 50
Nordic Needle – Colonial size 24 only, pack of 1000
Stitchtastic (UK) – unspecified brand, packs of 50, 100, or 500
John James (UK) – packs of 1000

or search for “bulk tapestry needles”, “1000 needles” etc. but be aware that some sellers of needles in bulk don’t sell to consumers. (I got Bohin needles from Anita Little Stitches and they are really nice needles. I mean they’re really nice. Too good for me — I keep dropping them and rolling my chair over them.) I believe John James are also good needles. I have no experience with Colonial needles. All the above vendors ship worldwide. Maybe sometime I’ll get a bunch of different needles and see how they stack up!


October 5th, 2011

I just finished a tutorial on gridding, in which I mentioned Easy-Count Guideline. I had more to say about this but didn’t have room in the tutorial.

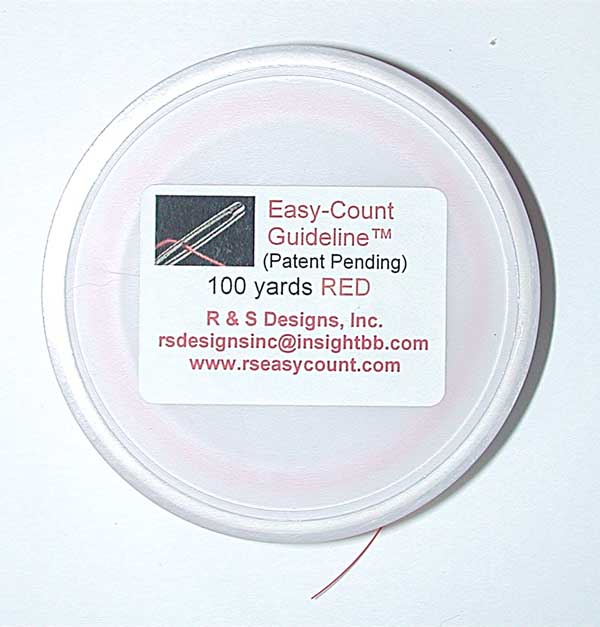
(If you’re coming late to the party, Easy-Count Guideline is a red plastic monofilament “thread” which comes on a spool in a little enclosed drum. The thread feeds out of a little hole in the drum.)

I read a post in the forums at some point in which someone stated that she uses Easy-Count Guideline but because it’s so expensive, she saves and reuses it. So how expensive is it? Well, it lists for $9 for 100 yards. $9 isn’t huge, but it is kind of a lot for a notion. Sewing thread is about $1.12 for 100 yards. DMC embroidery floss is about $4 for 100 yards. So what is so special about Easy-Count Guideline? I bought a spool to find out.

It says “Patent Pending”. I’m not sure what they’re patenting here. They didn’t invent monofilament line. True, the little box is pretty cool — if you’ve ever used nylon “invisible” thread, you know that as soon as you loosen the end, it starts unspooling itself like crazy, and that’s not an issue with this packaging. If you read their web site, you would think that they invented gridding. Almost none of the benefits they list are unique to Easy-Count Guideline. The only advantage it has over anything else you might use to grid is that it is really, really strong. You can’t pierce it with a needle, so you can leave it in until you’re finished stitching … completely finished. I feel fairly confident in saying that you won’t be able to pull this stuff hard enough to break it. I am not as confident that if you leave it under 500 stitches that you will be strong enough to pull it out. In the limited testing I’ve done, you have to pull hard to get it moving but it is slippery so once started it comes out fairly easily. But I don’t trust that I would be able to get it out from under a whole row of stitches, so I’m basically removing it as I go. I am also stitching on 22-count Hardanger cloth currently, and the Guideline takes up a lot of room. If I stitch over it, it raises the stitches a little, and in these cramped quarters it’s tricky getting past it.

I wondered why you wouldn’t just use some other, less expensive, plastic thread, maybe something that comes in multiple colors (I am hugely sold on color gridding). I went to JoAnn and was surprised to find that aside from the “invisible” nylon thread (which is unsuitable for gridding for obvious reasons) there is actually no non-spun sewing thread. I did get a spool of Sulky Sliver (also something I read about in the forums) but I couldn’t find it locally. It is a “thin, flat ribbon-like polyester film that is metalized with aluminum to make it brilliantly reflective”, according to Sulky. It comes in lots of colors and it’s probably not possible to pierce it with a tapestry needle, so you could stitch over it, and it’s about $1.88 per 100 yards. It’s pretty strong, but not as strong as Easy-Count Guideline. MRA was able to break a length of it, which he couldn’t do with the Guideline. Would it break being pulled out from under a lot of stitching? Let me know if you try it — I’m not going to. I do like it for the page boundaries with my color gridding — the metallic thread really stands out and since it’s more plastic than metallic, it’s easy to work with.

But back to Easy-Count Guideline — how is it any different from fishing line? I went to Academy to find out.

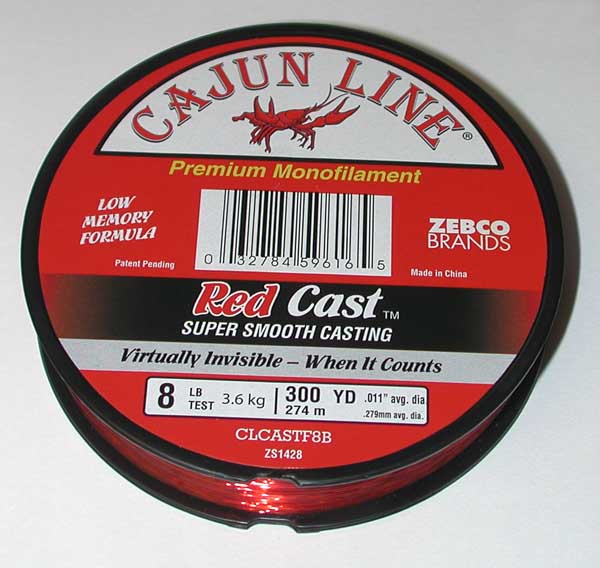
It turns out that a lot of fishing line is colorless, but it does come in red and green. I got red, 8-pound line, which was the lightest they had in stock. It was $1.50 per 100 yards. (Look for monofilament line, not “braided”.) It is a transparent red, while the Easy-Count Guideline is more opaque, but it’s hard to see a difference on fabric.

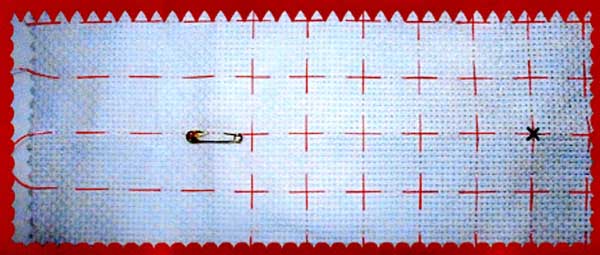
The top one is Guideline; the lower one is fishing line. It’s pretty hard to see any difference. The threads going vertically are sewing thread, and this is 22-count Hardanger cloth. The Guideline might be a teeny bit softer but they both tend to kink at the end of stitches. Fishing line comes in lighter weights and 6- or 4-pound might be better. The fishing line was taped to the spool and it does start unspooling the second the tape is off, whereas Guideline has that coolio box … but I put the fishing line inside a zip-loc bag and poked the end through the bag, and now it can just live in there and do its thing. (If I wanted to futz, I could probably make a sleeve for the fishing line like the Guideline has.) The Guideline also has extensive instructions — seriously. And not altogether helpful instructions, in my opinion. They assume your pattern will not have a 10 x 10 grid and want you grid from the center out and then mark the pattern to match your fabric. Obviously, you need to make the fabric grid match your pattern grid, and the center point is quite possibly not at the intersection of two bold lines. Probably the key point is to take long stitches since this material strains the fabric. They want you to have 6 stitch lengths on top and 4 underneath so you have a series of broken boxes to match the grid in the pattern, like this:

I could not find Easy-Count Guideline at JoAnn or Michael’s, but a shop specializing in needlework might have it, and it’s easily found online. Is the nice packaging worth $7.50? That’s what it boils down to, that and the fact that anyplace that sells sporting goods will have fishing line.

One last note from a reader, beading supply stores sell a product similar to Guideline in a variety of colors for a much lower price. It’s called nylon beading cord. It may not be available at general craft stores but you can easily find it online.


Privacy policy | Return policy | Site map | Member services | Contact us | Help
Copyright © 2002-2024 Scarlet Quince, LLC. All rights reserved.
You are welcome to link to this page but you may not use words or pictures on another site without written permission.