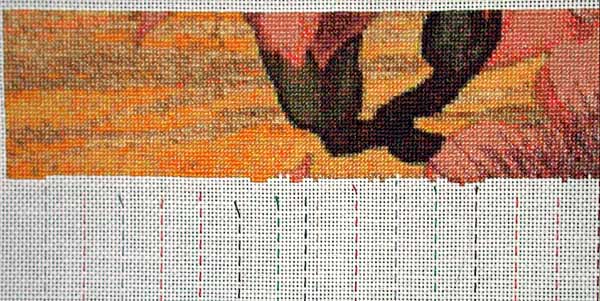
The piece I’m stitching, Blue Peacock – Jesse Arms Botke, has a lot of areas that look much like other nearby areas — the background, the tips of the feathers. I usually just put in grid lines at page boundaries and for patterns with a variety of small objects, that’s good enough. I don’t need every tenth line gridded to keep my place. That wasn’t working with this pattern, so for the first time, I added grid lines on the fabric corresponding to all the dark vertical lines on the chart. (I don’t need horizontal lines because I don’t leave gaps within a column of stitching, only within rows.) Although it was easier to keep my place, I found I was still doing a lot of counting. Maybe I’d be stitching the asterisk symbol, tie off one place, then look around for more asterisks and find some the 4th block over on a page. I’d count over on the fabric, compare what I’d highlighted as complete on my chart to what I had stitched on the fabric, and because I sometimes forget to highlight stitches as I finish them, it wouldn’t quite match so I’d count the blocks on the chart and fabric again. All in all, a lot of counting just to do a couple of stitches.
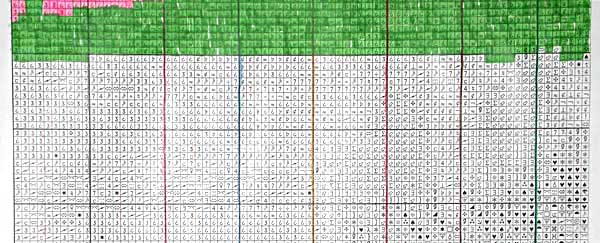
I suddenly realized that if I gridded in different colors, and marked those colors on the lines on the chart, I wouldn’t need to count. I could just say to myself, “Just right of the orange line” or “Midway between the red and blue lines”. I got out my box of thread and I found some fine-pointed felt-tip markers that someone gave me years ago that miraculously have not dried up and redid my grid. It would be nice to have a wider range of colors since dark colors can be hard to tell apart, but I found that the pale colors are hard to see on the fabric. (I have many more colors of floss than left-over thread, but floss tends to leave little shreddies when you pull it out, at least on aida, so something with a harder finish is better for gridding.) So I’m using a medium blue, gray, dark green, brown, dark red, red, pink, and orange, and black for the page boundaries.
Here’s how it looks on the fabric (about 2 pages worth).

And this is the first page of that on the chart.

As an additional sanity check, I’m making sure that the colors are in different orders on every page. If I’m looking for an area bordered by blue and red, and the color to the right of the blue line is gray, then I must be on the wrong page. So far that hasn’t come up but it can’t hurt.
This is making my stitching go SO MUCH FASTER you wouldn’t believe it. Not fast, mind you, but fastER. I haven’t timed myself with this method but my impression is that I’m stitching at least twice as fast. Right now I’m whipping through a section where it’s the tips of the feathers and very mixed colors. I haven’t worked in this area in a while in preference to doing background the peacock’s body but I remember that it was very slow going. I don’t get discouraged so much by millions of isolated stitches, as by the feeling that I’m spending most my time not stitching but hunting for my place. I’m totally sold on this — I will probably do this in the future even on pieces that don’t strictly need a grid.
An improvement would be to go out and buy thread that is strikingly different colors. It’s easy to tell the thread colors apart on the fabric but the corresponding markers don’t come out as different as would be ideal, particularly the reds and oranges. If I had a dark yellow, a turquoise, a medium green, etc. it would help, but I just used what I had around.


From Divecat
14 years agoWow, ingenious!
From cecilia garrec
14 years agoGreat idea! Thanks for sharing. I will definitely try this!!
From Karen
14 years agoWow, great idea – I see the makers of Sharpies seeing an increase in sales soon