Let’s start by saying that joining two pieces of fabric for a single cross stitched piece is not a good idea unless you are making something the size of a theater curtain. But occasionally people find (after they are well into a project) that their fabric is too small. This can happen because they calculated the size wrong (we recommend using our fabric calculator) or because the weave is not quite what it is supposed to be. Always check!
I tested my ideas about joining two pieces of fabric on scraps of aida and linen. I bought some Pellon fusible sheerweight interfacing and some Stitch Witchery.
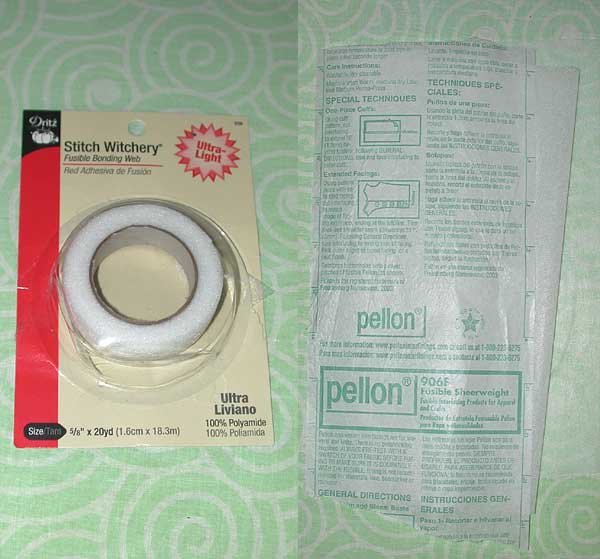
The Stitch Witchery is just a band of adhesive. It’s really for putting between two pieces of fabric, say if you need to fix a hem and don’t feel like sewing it. I knew that but thought it might work to bond it to the fabric with a piece of tinfoil on top. Unfortunately it bonded very thoroughly to the tinfoil as well as the fabric.
The Pellon is a non-woven, very sheer interfacing with tiny glue dots on one side. You can see it there, sort of (sorry about the terrible pictures) — it’s the white stuff to the right of the Pellon label. And don’t be like me and get a piece that doesn’t include the instructions for fusing it!
Start by pressing the fabric on the appropriate setting (cotton or linen), then trimming the edges you want to join so that they are perfectly straight and there are no frayed bits. Trim between the threads. (It’s the vertical edges in this picture.)
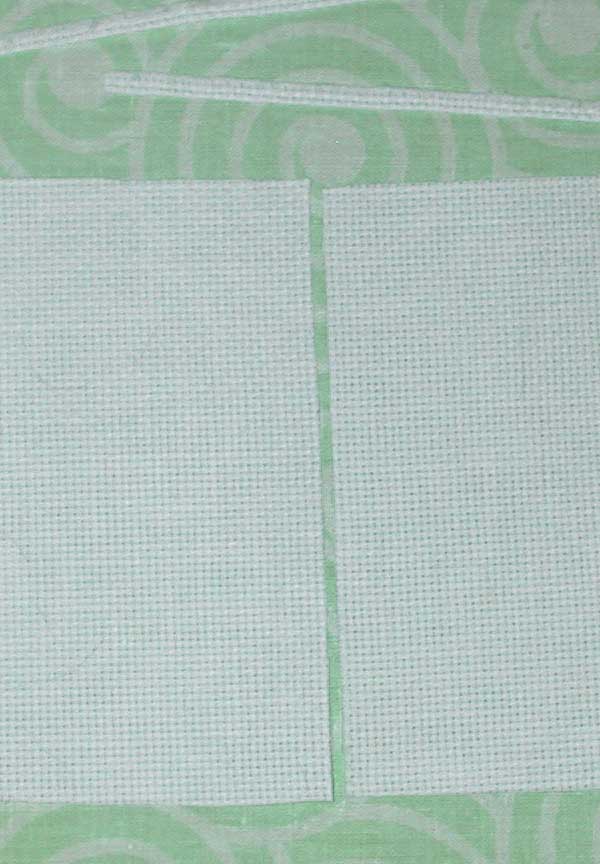
Cut a strip of Pellon about an inch wide and the length of the sides you need to join.

Put the strip of Pellon with the glue side up on your ironing board. Put one piece of fabric on it so that half is under the fabric and half is sticking out. You are going to fuse the fabric one piece at a time to minimize the chance of it shifting.
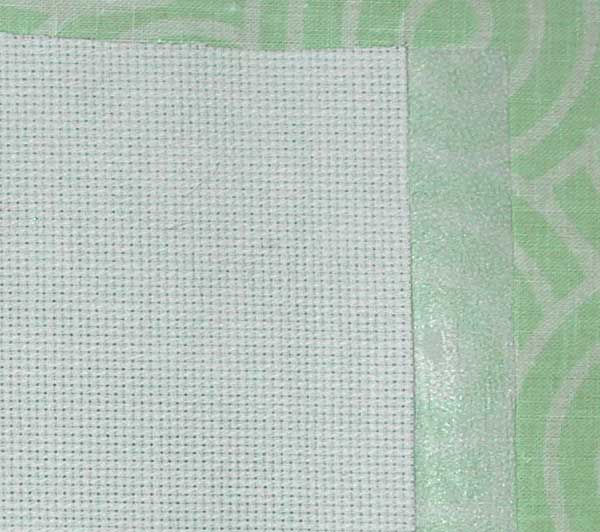
I had to search for instructions for fusing the stuff and this is what I came up with. Follow the instructions that come with your Pellon if they’re different. Set the iron to the polyester setting. Put a damp press cloth over just the part you want to fuse. Something without a hem would be better. The hem is over a little of the exposed glue dots — I only pressed up to the hem. Put the iron down on the press cloth and leave it for about 10 seconds. Don’t rub it around. Just set it down and leave it in one spot.

After 10 seconds, pick up the iron. The press cloth should be dry where the iron sat. Let the fabric cool and check the bond. Apply more heat if it doesn’t seem completely fused. Continue in sections until the Pellon is all fused to one piece of fabric.
This is the back (glue dots down).
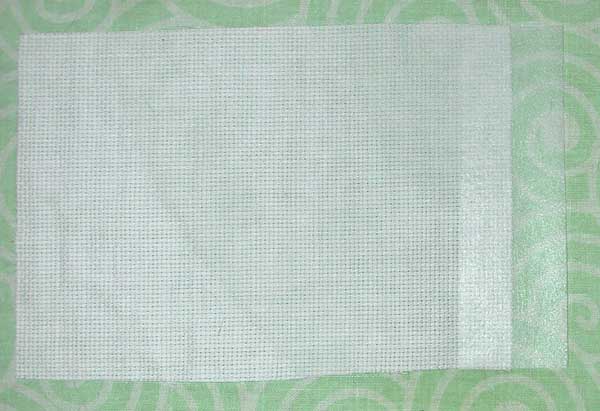
Now, with the glue side up again, carefully put the other piece of fabric on the Pellon butting up against the first piece of fabric. You have to make the threads that go across the join line up. This is where you will wish you were dead, but don’t despair — a little patting and prodding and it will work out. Carefully put the damp press cloth over the whole thing. Tap it briefly with the iron, then peek and make sure it didn’t somehow shift. Then finish fusing it. Here is the fused piece with the Pellon on the bottom. Pretty good!
Now just continue stitching. When you get to the Pellon, you can still see the holes but you can’t really find them with your needle anymore from the back. I ended up doing this: before each “down” stitch, I poked a hole where the next “up” stitch would be. (You can poke a lot of holes in advance but they tend to close up.)
Wherever you can, carry the thread across the join, like this, even if you are carrying the thread a lot farther than you normally would:
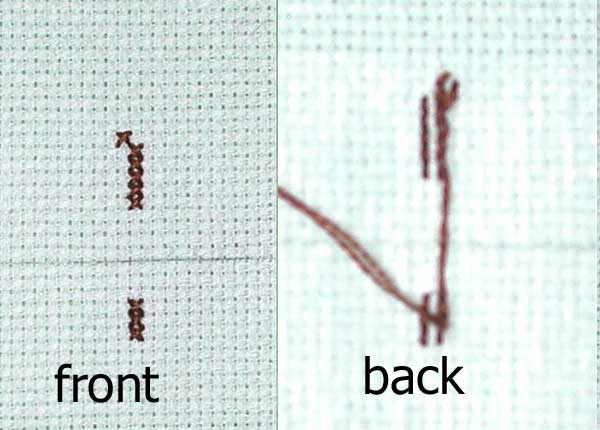
This will strengthen the join. The Pellon is not very strong by itself. (There are stronger weights, but you need to be able to see through it.)

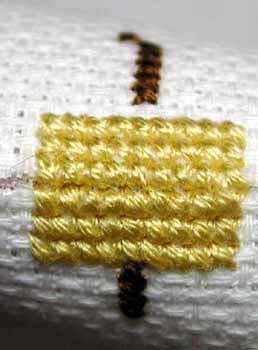 Here’s a little swatch stitched across the join. Can you see it? It’s between the 3rd and 4th row of yellow stitches. You can see it if you know where it is, but I think it would be OK. The problem is, since it is only reinforced on one side, it breaks to the front (right photo), so you would not want to use it for a pillow or anything that didn’t have firm support behind it.
To alleviate the break problem, I tried stitching with sewing thread across the join before cross stitching over it. I made the stitches 2 cross stitches high and just used ordinary sewing thread. I used gray because there was a spool sitting right there and I figured the stitches would be covered by cross stitch.

It helped with the break problem but the thread did show. The little fuzzy frayed ends got up into the stitches too.
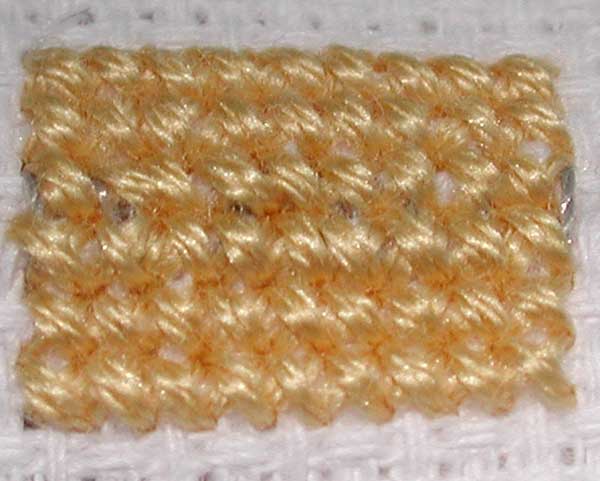
So then I cut a strip of Pellon about half an inch wide and fused it over the join in the front. It’s harder to stitch through two pieces of Pellon than one, but not much. Just keep poking those holes. You can still see them — the Pellon fills most of this picture — compare the holes at the very top and bottom.
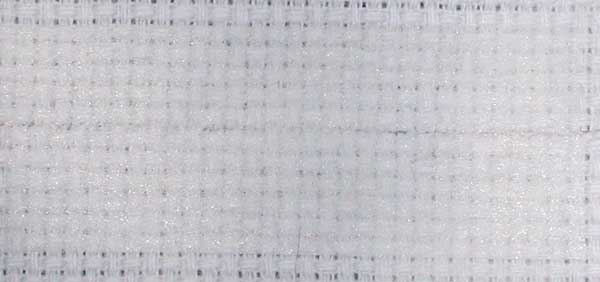
This is much better (regarding the tendency to break) and it is also stronger.
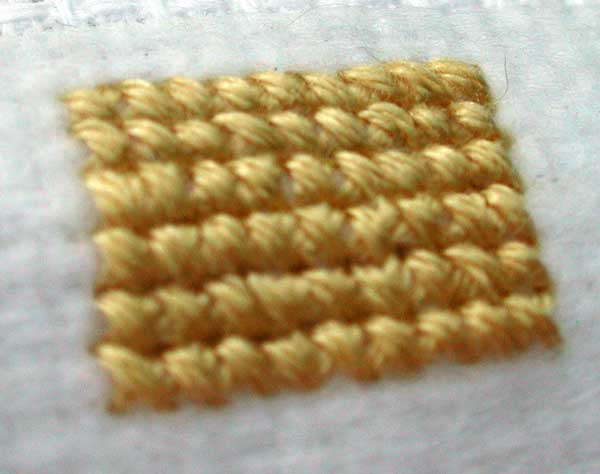
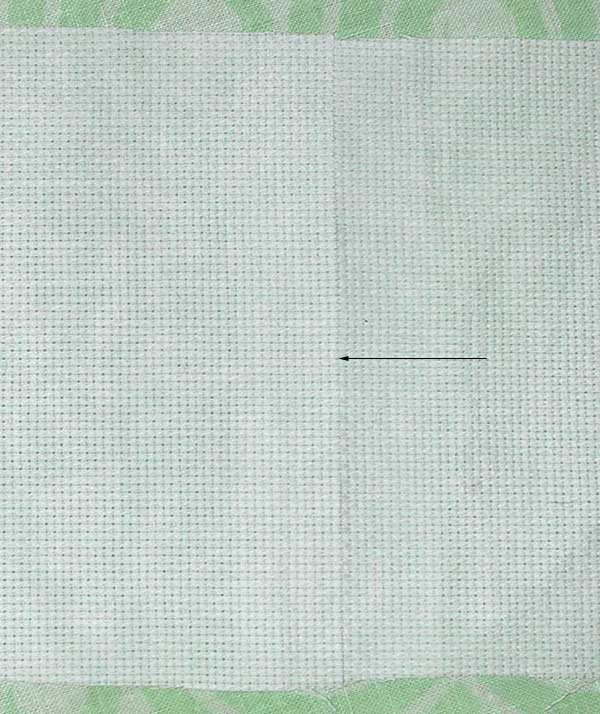
You can join linen in the same way, with one important difference: trim the fabric in such a way that you are cross stitching OVER the join (assuming you are stitching over two), instead of having the join between two rows of stitching. Count it, check it, and double-check. It won’t be terrible if you don’t get it right but it is significantly better if you do. The arrow points to the join. Although you can’t tell from the cropped photo, the fabric is curved and you can see a little break at the join where there is no stitching but the stitching is very flat.
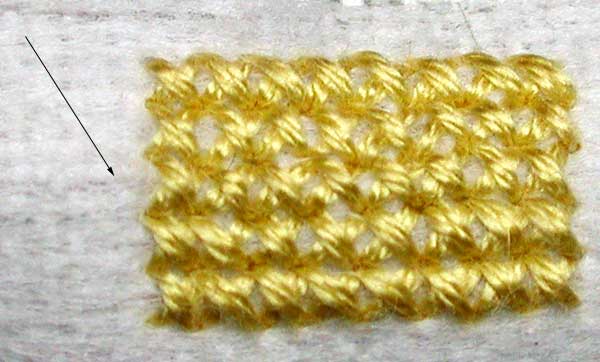
For some reason the Pellon is coming loose from the linen. I don’t know why. It might be because this is a pretty loose weave, so maybe a lot of the glue dots are in holes. Once you have stitched over it all, it doesn’t really matter whether it is fused or not, but if I were doing more than a little swatch, I would refuse it. Having it coming loose makes it harder to stitch.
Do warn your framer about your join. The linen is stronger than the aida because it is stitched across the join, but you don’t have to pull too hard to see the join in the aida open up just a tiny bit.
Another possible way to do this would be to lap one piece of fabric over the other and have a section where you are stitching through two pieces. I haven’t tried that because I think it would make a bump. As soon as I typed that sentence, I decided I needed to try it.
I tried it 3 ways and found that it doesn’t so much make a bump as a wide place. I lapped the upper piece of fabric over the lower, reasoning that the light would normally be coming from above and this would be the best way to avoid a shadow. I now think that’s backwards — to avoid a shadow you want the lower piece lapped over the upper. Anyway.
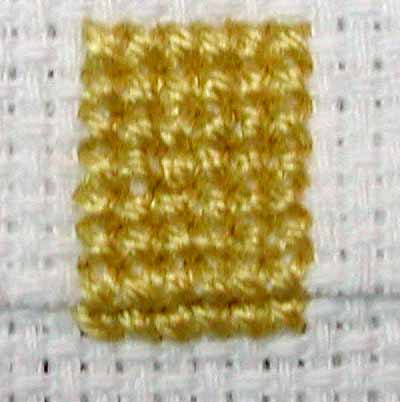
I first tried overlapping the two pieces and starting above the overlap and stitching straight down. I didn’t pin the pieces and had a lot of trouble with the fabric shifting and pivoting. As you can see, the last row of stitches (where the overlap ends at the bottom) is wider than the rest but even worse, the next row is too narrow.
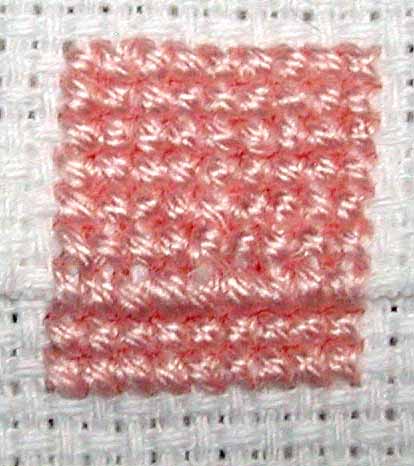
Next, I tried stitching the bottom row of the overlap first, and continued with the two rows below that. Then I went back up above the overlap and stitched down to the row I had stitched first. This time, I pinned it, which helped a lot. Also, by stitching the last row of the overlap first, it was easier to get the holes lined up for that row. It still is noticeable though. It seemed to me that now the problem was cumulative error in lining up holes pushing toward the “bump” row.
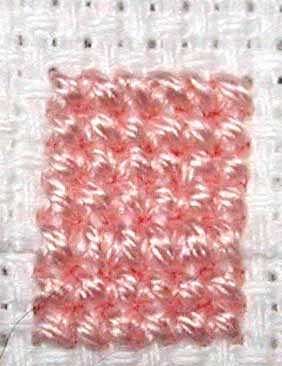
Finally, I tried starting with the bottom row of the overlap, then stitching the two rows below it, then turning the fabric upside down and stitching away from the “bump” row. This worked better and it was a little easier to line up the holes. They never really do line up, though. You have to find the hole on the bottom piece of fabric and then feel around in the top piece until you find the hole. And although this is a small sample and it’s hard to tell from the picture, the bottom row of the overlap IS noticeably wider than the surrounding rows. It is no worse than the effect you get sometimes stitching on linen when the weave is uneven, but you can see it, and in a row two feet long, it might be quite noticeable.
So, if you have to join two pieces, you have a choice between an invisible but somewhat weak join using Pellon, or a really strong but noticeable join overlapping the fabric. (My overlap was only 5 rows but it is rock solid.)
![]()


 Here’s a little swatch stitched across the join. Can you see it? It’s between the 3rd and 4th row of yellow stitches. You can see it if you know where it is, but I think it would be OK. The problem is, since it is only reinforced on one side, it breaks to the front (right photo), so you would not want to use it for a pillow or anything that didn’t have firm support behind it.


 I first tried overlapping the two pieces and starting above the overlap and stitching straight down. I didn’t pin the pieces and had a lot of trouble with the fabric shifting and pivoting. As you can see, the last row of stitches (where the overlap ends at the bottom) is wider than the rest but even worse, the next row is too narrow.
 Next, I tried stitching the bottom row of the overlap first, and continued with the two rows below that. Then I went back up above the overlap and stitched down to the row I had stitched first. This time, I pinned it, which helped a lot. Also, by stitching the last row of the overlap first, it was easier to get the holes lined up for that row. It still is noticeable though. It seemed to me that now the problem was cumulative error in lining up holes pushing toward the “bump” row.
 Finally, I tried starting with the bottom row of the overlap, then stitching the two rows below it, then turning the fabric upside down and stitching away from the “bump” row. This worked better and it was a little easier to line up the holes. They never really do line up, though. You have to find the hole on the bottom piece of fabric and then feel around in the top piece until you find the hole. And although this is a small sample and it’s hard to tell from the picture, the bottom row of the overlap IS noticeably wider than the surrounding rows. It is no worse than the effect you get sometimes stitching on linen when the weave is uneven, but you can see it, and in a row two feet long, it might be quite noticeable.